How to remove unwanted objects from a photo, free
Brush over it with the free Magic eraser, or describe the change with Edit by prompt for 1 credit. Which tool fits which job, step by step, with a real example.

To remove an unwanted object from a photo for free, open it in a browser editor, brush over the object with a magic eraser, and let the tool fill the spot with what should be behind it. When the object is big, there are several of them, or it sits on a pattern, describe the change in words with an AI edit instead.
This guide covers both, step by step, in the free StockUnlimited editor. It includes a real before and after we made with Edit by prompt (and the exact prompt), a table of which tool fits which job, and what you’re allowed to remove from photos you don’t own.
Which tool should you use to remove something from a photo?
It depends on what you’re removing and what’s behind it. A lamp post against a clear sky is easy. A person standing in front of a brick wall is not, because the tool has to invent the bricks.
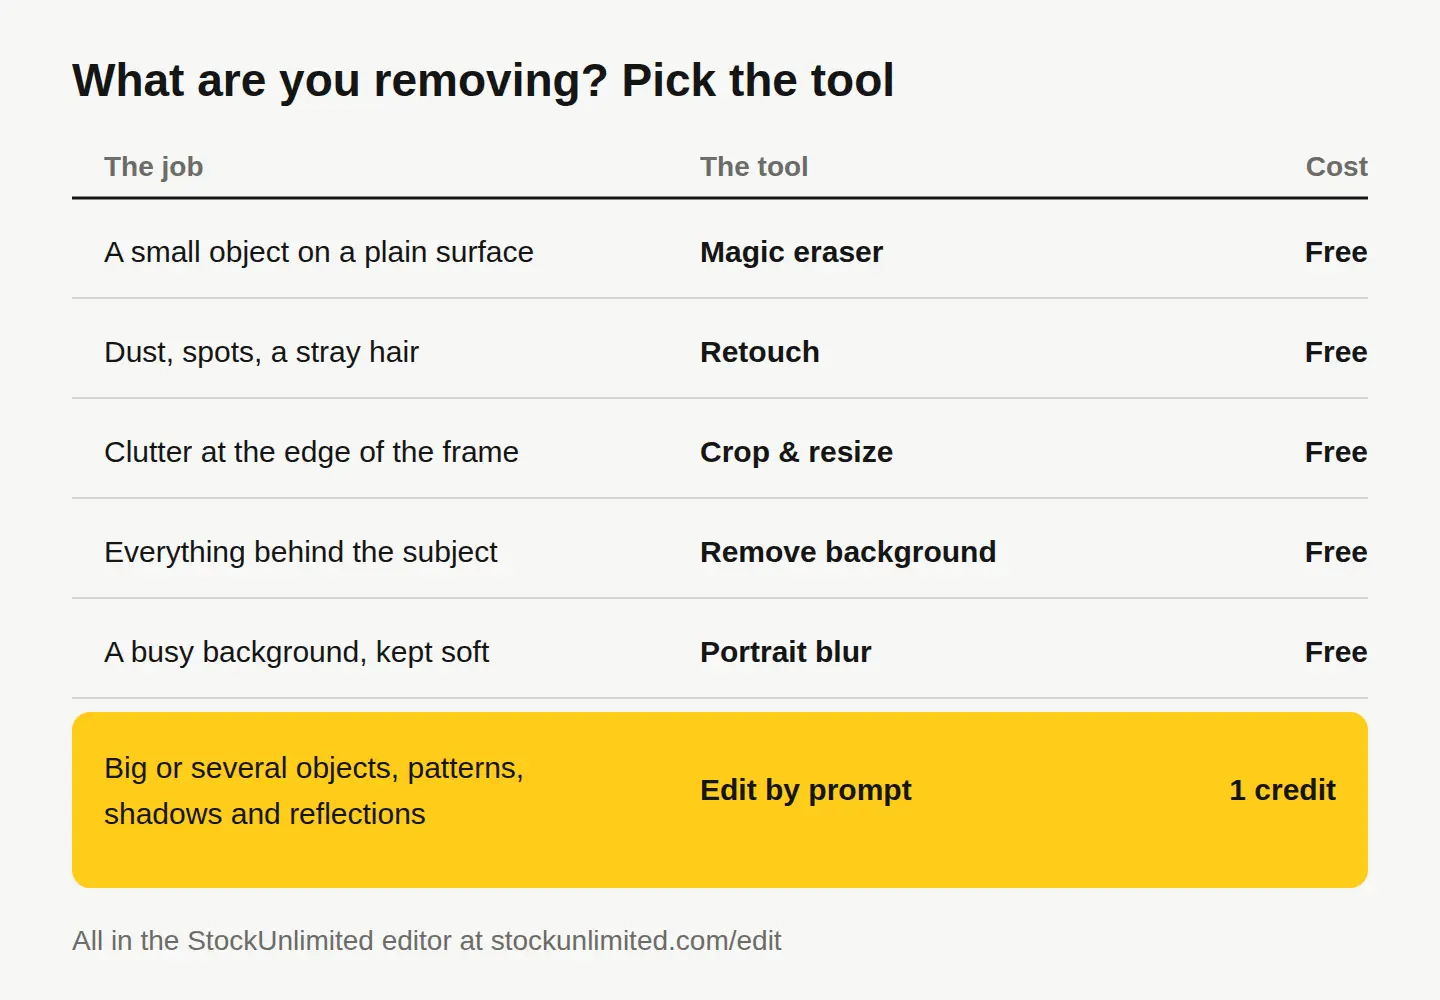
| What you’re removing | Best tool | Cost |
|---|---|---|
| A small object on a plain surface | Magic eraser | Free |
| Dust, spots, a stray hair, a small scratch | Retouch | Free |
| Clutter at the edge of the frame | Crop & resize | Free |
| Everything behind your subject | Remove background | Free |
| A busy background you want soft, not gone | Portrait blur | Free |
| Big objects, several at once, patterns, shadows and reflections | Edit by prompt | 1 credit |
Start with the cheapest tool that could work. If the crop solves it, you don’t need to fill anything in at all.
How do you remove an object with the Magic eraser?
The Magic eraser is free, adds no watermark, and runs in your browser. Nothing uploads until you save.
- Open the free photo editor and load your photo. It opens JPG, PNG, WebP, GIF and BMP files, or any image in your StockUnlimited library.
- Pick Magic eraser from the tools.
- Brush over the object you want gone. Cover all of it, including its shadow, and a little of the surface around it.
- Let go. The tool fills the area in from what’s around it.
- Zoom in and look at the edges. If a faint outline is left, brush over just that part again.
- Export with Resize & export as PNG, JPEG, WebP or PDF, or save it to your library.
Three habits make a big difference:
- Brush the shadow too. A removed cup that leaves its shadow behind looks stranger than the cup did.
- Work in small passes. Two or three small strokes usually blend better than one huge one.
- Keep the original. Save an untouched copy to your library or your device first. Drafts autosave with every layer editable, but a clean original is the surest way back.
When should you use Edit by prompt instead?
Use Edit by prompt when brushing isn’t enough: the object is large, there are several things to remove, or the fill has to continue a pattern like wood grain, tiles or text on a sign. You describe the change in words and the AI makes it. It costs 1 credit an edit, which is 1 cent.
Here’s a real example. We started with a licensed stock photo from our catalog: a cup of coffee on a white wooden table, with a phone and a car key next to it.

We wanted the same table and cup with lots of empty space for a headline, so we typed this into Edit by prompt:
Remove the smartphone and the car key from the table. Keep the coffee cup, the saucer, the white wooden table and the lighting exactly as they are.
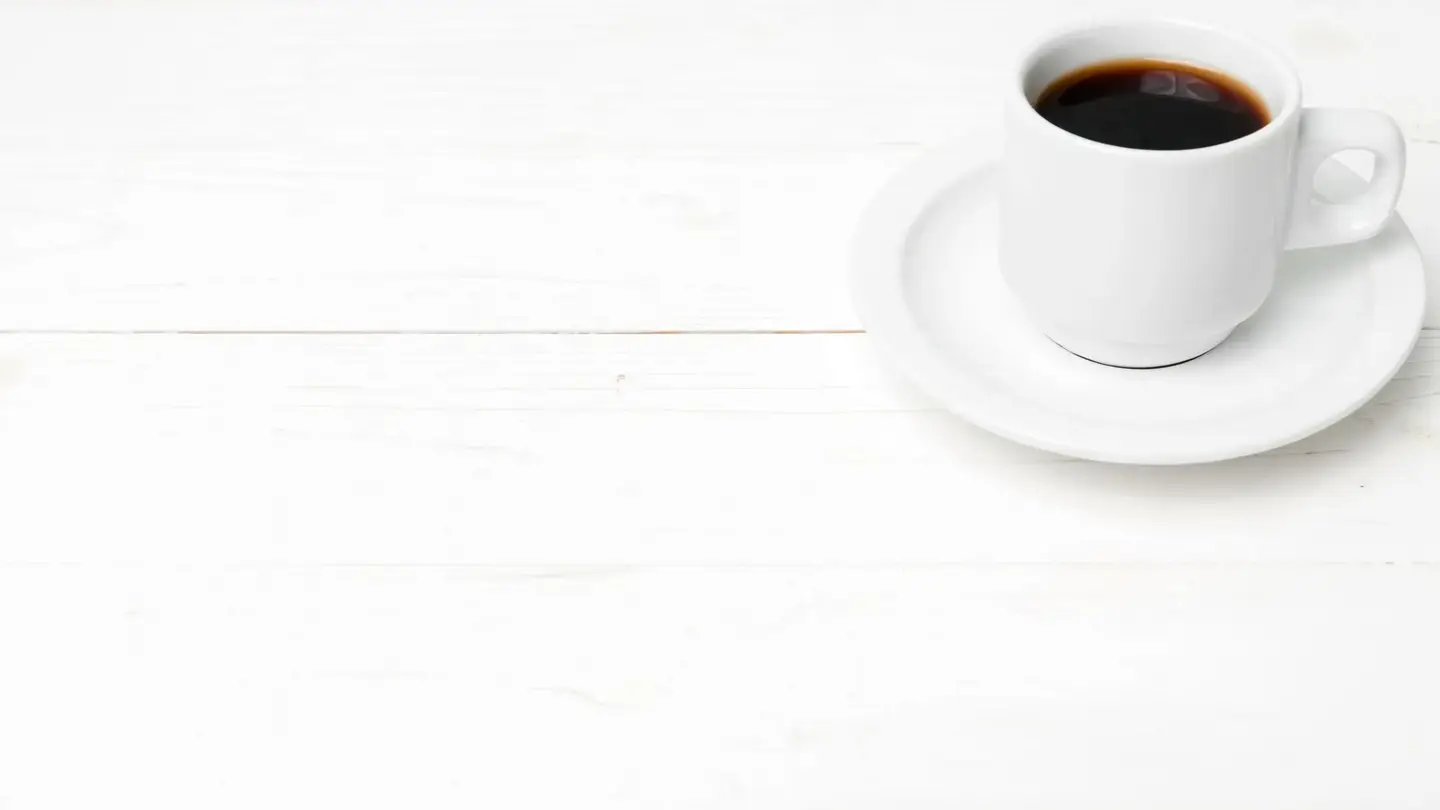
That one edit removed two objects at once, and the table’s boards and grain run straight through where the phone used to be. With a brush, that’s two large fills across a patterned surface, which is exactly where brushed removals tend to smear.
Notice the second sentence of the prompt. Telling the AI what to keep matters as much as telling it what to remove. Without it, an AI edit may “improve” things you didn’t ask about, like the light or the color of the cup. For more on writing clear instructions, see how to write AI image prompts that get what you want.
A few prompts that work well for removals:
- “Remove the person in the background on the left. Keep everything else the same.”
- “Remove the power lines from the sky.”
- “Remove the price sticker from the bottle and keep the label as it is.”
- “Remove the crumbs and the napkin from the plate.”
Remember that an AI-edited photo is no longer a straight record of what the camera saw. If the picture has to prove something, like the actual condition of a product you’re selling, don’t edit away what the buyer needs to see.
How do you remove small blemishes, dust and spots?
For tiny flaws, use Retouch instead of the Magic eraser. Brush over a dust spot on a product shot, a crumb on a plate, a scuff on a wall or a stray hair, and it’s gone. Because the area is small, the result is almost always invisible.
For portraits, Beautify smooths skin, and Portrait blur softens a distracting background behind a person without removing anything. A soft background is often a better fix than erasing things one by one, and it keeps the photo honest.
If what you really want is your subject on its own, skip the eraser: our free background remover cuts the subject out as a transparent PNG, and the photo never leaves your device.
Can you remove a watermark, logo or text from a photo?
You can remove text, logos and stickers from photos you own or have licensed, like a price tag in your own product shot or a sign in a licensed stock photo. Editing a licensed stock photo is fine and doesn’t change the license, though the license’s legal protection covers the original photo only.
What you shouldn’t do is remove a watermark from a photo you haven’t licensed. A watermark is how the owner marks the photo as theirs. In the US, knowingly removing copyright information like that to hide infringement is prohibited under 17 U.S.C. § 1202, separately from the copyright itself. If you like a stock photo, licensing it costs 10 credits, which is $0.10.
There’s also a practical reason to remove text from your own images: some platforms reject it. Google’s Merchant Center, for example, flags promotional text and overlays on the main product image (Google’s help page on text on images). Erasing a “SALE” badge from your product photo is a legitimate and common edit.
This section is general information, not legal advice. Read the full license for what’s covered.
Why does the fill sometimes look wrong?
A removal tool has to guess what was behind the object. It guesses well on plain or random surfaces and badly on anything with structure. The usual problems and fixes:
- A smudgy patch. The brushed area was too big. Undo and remove the object in two or three smaller passes.
- Broken lines. Straight edges like table edges, door frames and horizons don’t line up. Try Edit by prompt, and name the line: “keep the edge of the table straight.”
- A leftover shadow or reflection. Brush it separately, or add “and its shadow” to your prompt.
- A repeated pattern. Tiles, bricks and fabric can come out as a blur. This is where Edit by prompt earns its 1 credit.
- Soft or low-resolution results. If you cropped hard after removing something, run Quick Upscale 2× in the editor for free, or the HD Upscaler for up to 4× and 4K at 1 credit.
Your next step
Pick one photo with something in it you’ve been meaning to get rid of and open it in the free editor. Try the Magic eraser first. If the fill doesn’t hold up at 100% zoom, run Edit by prompt with a two-sentence prompt: what to remove, then what to keep.
New accounts get 30 free credits with no card, then 3 free credits every day, so your first thirty AI edits cost nothing. Plans start at $4.99 a month for 500 credits.
Questions people ask
- Does removing an object lower the image quality?
- Only in the area that gets filled in, and only if the fill doesn't match. Check that spot at 100% zoom before you export, and save as PNG if you plan to edit the image again.
- Can I remove a person from a photo?
- Yes. A small person in the background usually works with the Magic eraser; someone large or close to your subject is a better job for Edit by prompt. Check the result carefully around hands, shadows and reflections.
- Is my photo uploaded when I use the Magic eraser?
- No. The editor runs in your browser and nothing uploads until you save. The Magic eraser is free with no watermark; only Edit by prompt costs anything, 1 credit an edit.
- Should I save as PNG or JPEG after removing something?
- Save as PNG if you'll keep editing, since it doesn't lose detail each time you save. Export a JPEG or WebP copy for the web, where smaller files load faster.
Keep reading
 Photo editingHow to change the season in a photo with AIName the season, say what changes and what stays, and one AI edit turns summer into fall. A real before and after, the exact prompts and a season cheat sheet.
 By industryWhat photos does an Etsy listing need? A shot-by-shot planThe real item first, then details, scale, options and packaging, at 2000 px or more. The full shot list, Etsy's crop trap, and free tools to make each photo.
 AI image generationHow to write AI image prompts that get what you wantDescribe a photo, not a topic: style, subject, setting, light, color and camera. See one idea prompted two ways, with the real results and exact prompts.